
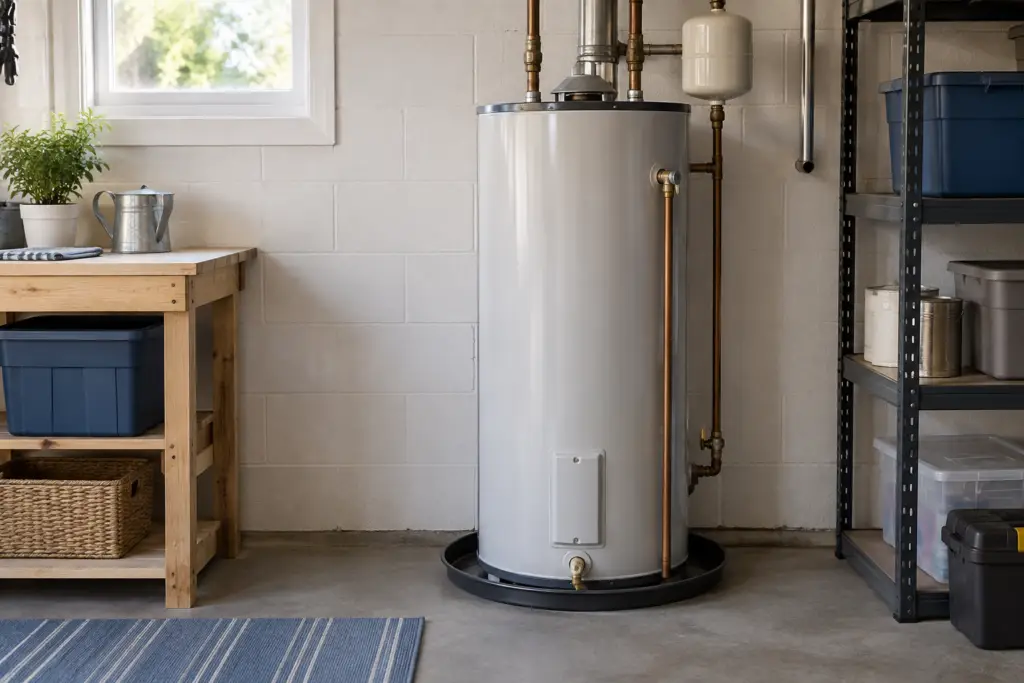
Your water heater is one of those appliances you barely notice—right up until the shower turns cold. When everything is working normally, it’s easy to wonder whether you’re supposed to be doing anything at all.
You are, but probably not as much as the internet makes it sound.
Good water heater maintenance mostly comes down to knowing what kind of unit you have, watching for a few changes, and handling the maintenance that actually applies to your system. Even better, many of those jobs can be grouped together instead of scattered across your calendar.
The goal isn’t to turn water-heater care into another hobby. It’s to give you a simple rhythm: know what matters, know roughly when it matters, and decide whether you want to handle the job yourself or bring in a pro.
How Often Should You Do Water Heater Maintenance?
For most homeowners, the easiest approach is to think in four stages.
| When | What to Do |
|---|---|
| Every few months | Take a five-minute look for leaks, corrosion, unusual sounds, error codes, or changes in hot-water performance. |
| Around 6 months | Handle any quick task that’s due. Heat-pump water heaters may need an air-filter cleaning at this point. |
| Once a year | Group the maintenance that applies to your water heater into one maintenance session. |
| As the heater gets older | Keep track of age, repair history, and replacement options before failure forces a rushed decision. |
When several annual tasks apply, group them in one maintenance window. Your water heater’s manual still determines what applies and when.
Start With One Easy Step: Photograph the Water Heater Label
Frequency: Once now; update when the heater is replaced
DIY Level: 1 — Easy DIY
Typical time: 5 minutes
Setup: Minimal
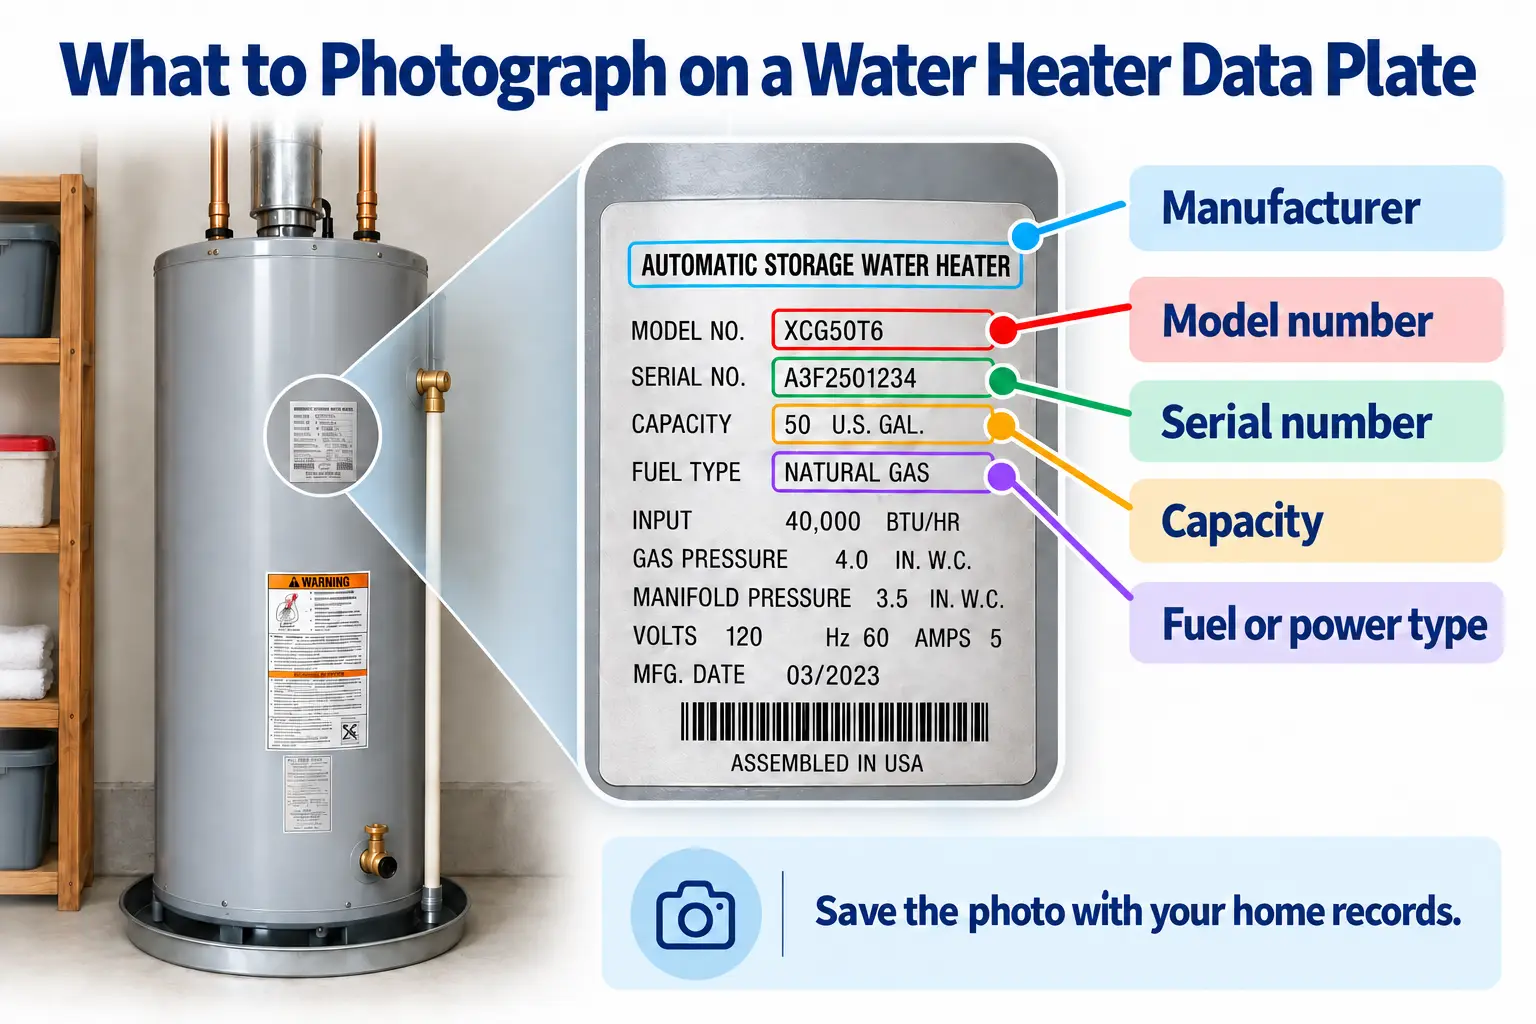
Before you drain anything or grab a toolbox, find the data plate on your water heater. A clear photo can help you find the correct manual, determine approximate age, check warranty information, identify parts, and give a plumber useful details later.
Take a clear picture showing the manufacturer, model number, serial number, fuel or power type, and capacity if it’s listed.
Don’t Have the Manual? Find It Online
Frequency: Once, then save it
DIY Level: 1 — Easy DIY
Typical time: 5–15 minutes
Setup: Minimal
If the previous homeowner didn’t leave the manual behind, that’s usually easy to solve.
Start with the manufacturer’s official website and search the exact model number from the data plate. Look for an owner’s manual, use-and-care guide, operation manual, installation manual, or maintenance instructions.
If the manufacturer’s site is difficult to search, enter the manufacturer name and exact model number in quotation marks in a search engine, followed by “manual” or “maintenance.”
Before following any procedure, make sure the document actually covers your model or model family. Similar-looking heaters can have different valves, filters, shutdown steps, and restart procedures.
Once you find the right manual, save it somewhere you can find again—or add it to your HomeOS home memory.
Watch Out: Don’t assume a generic video is correct just because the heater looks like yours. Model-specific instructions matter when a task involves hot water, gas, electricity, draining, or safety equipment.
Every Few Months, Give the Heater a Five-Minute Look
DIY Level: 1 — Easy DIY
Typical time: 5 minutes
Setup: None
You don’t need to take anything apart.
Look for changes: a faint rust streak below a fitting, white mineral crust around a connection, a few drops in the drain pan, moisture on the floor, corrosion, staining, or something that simply wasn’t there the last time you looked.
Pay attention to performance, too. Maybe the shower that normally stays hot suddenly cools sooner. Maybe you hear a new rumble when the heater operates. Maybe the hot water looks rusty or an error code keeps returning.
You’re not trying to diagnose the problem. You’re looking for change.
That five-minute habit may be the simplest useful thing you can do for a water heater.
What Maintenance Does a Water Heater Need?
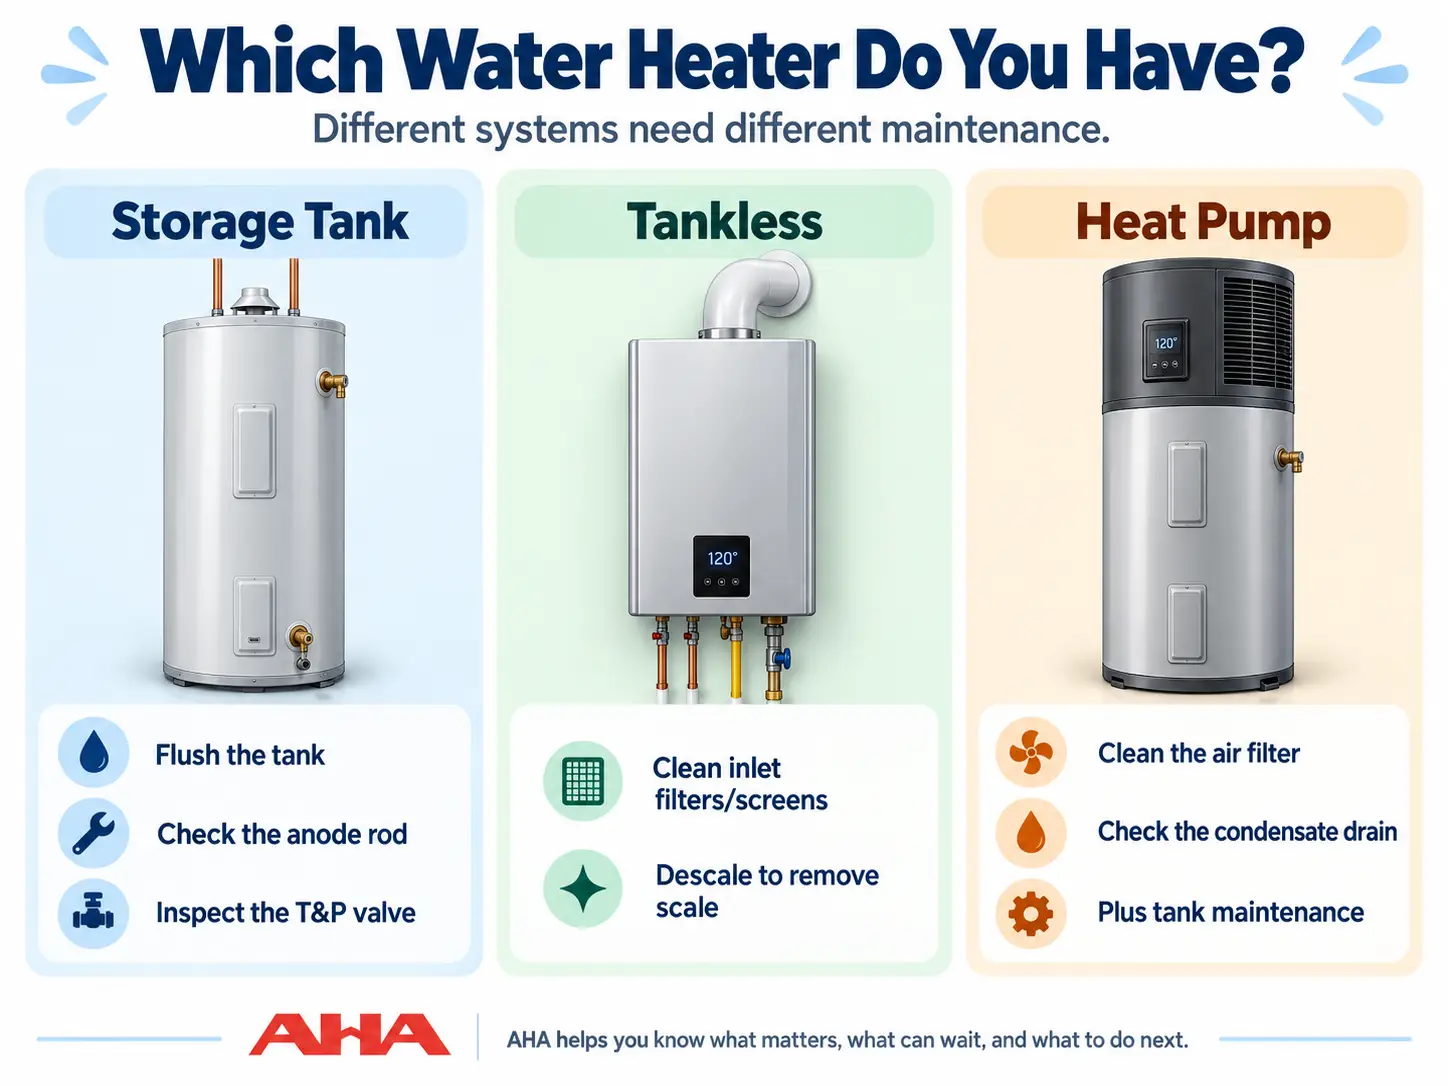
It depends on the type of heater you own.
| Water Heater Type | Maintenance That Commonly Matters |
|---|---|
| Storage tank | Flushing, anode rod, temperature-and-pressure relief system |
| Tankless | Scale removal or flushing, inlet filters or screens |
| Heat pump | Air filter, condensate drainage, plus applicable tank maintenance |
| Gas-fired | Venting and combustion-system condition in addition to the applicable maintenance above |
For the sections below, AHA uses four DIY levels.
| DIY Level | What It Means |
|---|---|
| 1 — Easy DIY | Basic observation or cleaning with little setup and low technical risk. |
| 2 — DIY With Care | Requires manufacturer instructions, shutdown procedures, basic tools, or additional setup. |
| 3 — Advanced DIY / Consider a Pro | More involved, physically difficult, model-specific, or easier to get wrong. |
| 4 — Pro Recommended | Gas, combustion, electrical diagnosis, significant pressure or safety problems, major corrosion, or repair work. |
The time ranges are AHA planning estimates, not manufacturer promises. Access, condition, water quality, model design, and experience can change the job considerably.
If You Have a Storage-Tank Water Heater
Tank maintenance mostly comes down to sediment, corrosion protection, and the heater’s pressure-relief system.
Flush the Tank if Your Manufacturer Recommends It
Frequency: Often about once a year
DIY Level: 2 — DIY With Care
Typical time: 45–90 minutes
Setup: Moderate
Minerals and debris can settle at the bottom of a storage tank over time. How quickly that happens depends partly on your water.
The Centers for Disease Control and Prevention (CDC) notes that many manufacturers recommend annual flushing, as well as flushing after plumbing work or when tap water becomes discolored. Follow the exact procedure for your model before starting; if the task involves hot water, unfamiliar valves, gas, or electricity, it is reasonable to call a professional.
CDC guidance on water-heater flushing and household water safety
Check the Anode Rod
Frequency: Follow your manual; annual inspection is common manufacturer guidance
DIY Level: 3 — Advanced DIY / Consider a Pro
Typical time: 45–120+ minutes
Setup: High
Many steel storage tanks contain a sacrificial anode rod. Its job is to gradually deteriorate so the steel tank has more protection from corrosion.
How quickly that happens depends on water chemistry, hot-water use, and water softening. A. O. Smith recommends annual inspection, but anode work can require large tools, substantial force, draining, and enough clearance above the heater that many homeowners choose to hire it out.
Inspect the Temperature-and-Pressure Relief System
Frequency: Typically annually
DIY Level: 3 — Advanced DIY / Consider a Pro
Typical time: 10–20 minutes for inspection
Setup: Low for observation
The temperature-and-pressure relief valve, commonly called the T&P valve, is a safety device.
Know where it and its discharge pipe are. Look for ongoing leakage, corrosion, damage, or obvious alterations, and follow the directions on the valve label and in the heater manual.
A. O. Smith recommends consumer inspection once a year. It also notes that recurring dripping can be caused by excessive water pressure or thermal expansion, which means the valve itself isn’t necessarily the underlying problem.
If it keeps releasing water, let a plumber investigate rather than simply replacing parts.
Watch Out: Never cap, plug, or disable the temperature-and-pressure relief system.
A. O. Smith water-heater maintenance guidance
If You Have a Tankless Water Heater
Tankless water heater maintenance is mostly about scale and filters.
Group Filter Cleaning and Descaling When They’re Due
Frequency: Filter periodically; flushing commonly at least annually for models with that recommendation
DIY Level: 2–3 — DIY With Care to Advanced DIY
Typical time: 15–30 minutes for filter care; roughly 60–90 minutes for flushing
Setup: Moderate to High
Tankless systems don’t store a large tank of hot water, but mineral deposits can still accumulate inside the heat exchanger.
Rinnai recommends periodic screen-filter cleaning and at-least-annual mineral flushing for the models covered by its homeowner guidance. Follow the exact instructions for your unit rather than assuming every tankless heater uses the same service valves or sequence.
Rinnai tankless water-heater flushing guidance
If You Have a Heat-Pump Water Heater
Heat-pump water heaters add two maintenance items many homeowners do not expect from a water heater: an air filter and condensate drainage.
Clean the Air Filter
Frequency: Every 6–12 months
DIY Level: 1 — Easy DIY
Typical time: 10–20 minutes
Setup: Minimal
ENERGY STAR recommends cleaning a heat-pump water heater’s air filter every 6–12 months, more often in dusty locations, and cleaning the condensate line annually so water can drain freely. Follow the manufacturer’s instructions before clearing or flushing the line.
Check and Clean the Condensate Drain
Frequency: About once a year
DIY Level: 1–2 — Easy DIY / DIY With Care
Typical time: 10–20 minutes
Setup: Low
Heat-pump water heaters create condensation much like air conditioners do.
ENERGY STAR recommends cleaning the condensate line annually so water can drain freely. Standing water in the lower drain pan can be a sign of a blocked drain or line.
Follow the manufacturer’s instructions before clearing or flushing the line.
ENERGY STAR heat-pump water-heater maintenance guidance
If Your Water Heater Burns Gas
Frequency: Look periodically; professional service according to manufacturer guidance
DIY Level: 1 to observe / 4 to repair
Typical observation time: 5 minutes
Include visible venting and combustion-air openings in your periodic five-minute check.
Look for obvious corrosion, loose or damaged venting, soot, blocked openings, repeated shutdowns, or other noticeable changes.
There’s a clear line between observing and servicing. Gas-pressure work, burner adjustment, combustion testing, electrical diagnosis, and significant vent repairs belong with a qualified professional.
You don’t have to understand combustion testing to recognize that soot or damaged venting deserves attention.
What Temperature Should Your Water Heater Be?
Frequency: Check when you move in, after replacement or service, or when household needs change
DIY Level: 1–2
Typical time: 5–15 minutes
There isn’t one perfect temperature for every household.
Hotter storage temperatures can reduce the growth of waterborne germs such as Legionella, but they also increase scald risk. CDC says keeping a home water heater around 130°F–140°F can kill germs such as Legionella. If the heater is set above 120°F, CDC recommends thermostatic mixing valves at faucets or showers to reduce burn risk and advises people with higher health risks to discuss the issue with a healthcare provider.
So don’t change the setting simply because an article gives you one magic number. Check the heater manufacturer’s guidance, consider who lives in the home, and follow applicable plumbing and anti-scald requirements.
How Do I Know When My Water Heater Needs to Be Replaced?
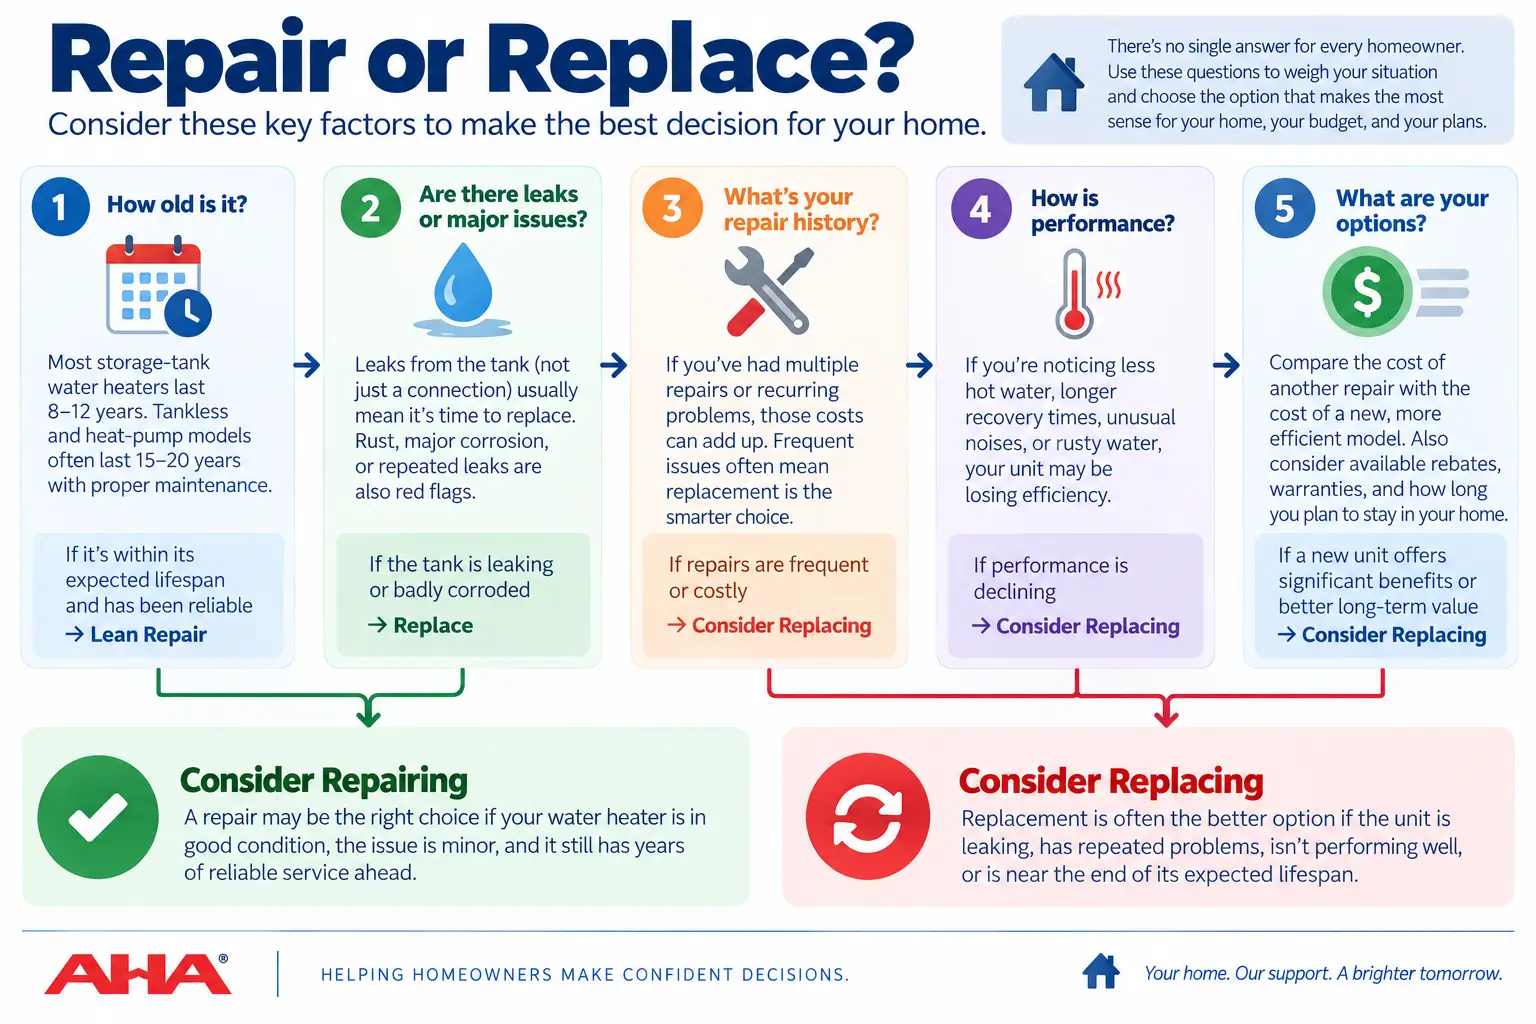
Good maintenance can help you stay ahead of problems, but every water heater eventually reaches a point where replacement deserves consideration.
Age matters, but it shouldn’t make the decision by itself. Pay more attention when an older unit also develops persistent leaks, serious corrosion, rusty hot water, declining capacity, unusual operation, or repeated repair needs.
If your water heater is getting older but still working normally, you don’t necessarily need to replace it tomorrow. This is simply a good time to know its age and understand your options before a failure forces a rushed decision.
For a deeper look at expected lifespan, warning signs, and repair-versus-replace decisions, read AHA’s Water Heater Lifespan: How Long Does a Water Heater Last? AHA’s existing lifespan article already covers those replacement questions in depth, making this maintenance guide a natural companion.
Keep a Simple Record of the Schedule
The hardest part of water heater maintenance often is not doing the work. It is remembering when you last did it.
AHA HomeOS gives your home a memory. For your water heater, it can keep the age, manufacturer and model, manual, warranty, service dates, repair history, contractor recommendations, reminders, and replacement-planning watch items together. Start with the photo of the data plate and add service information as it happens.
When Should You DIY—and When Should You Call a Pro?
There’s no prize for choosing the hardest DIY option.
A Level 2 or Level 3 project may be technically manageable and still not be how you want to spend your weekend.
Consider calling a professional when the work involves gas or combustion, electrical diagnosis, safety or pressure problems, major corrosion, a leaking tank, unfamiliar shutdown/restart procedures, or anything you aren’t confident you can complete safely.
For a broader way to think through that decision, AHA also has a guide to DIY Home Repairs: Fix It Yourself or Call a Pro?
And if several home projects are competing for your attention, the AHA Protect–Prevent–Improve Framework can help you decide what needs action first and what can wait.
The Water Heater Routine to Remember
You don’t need a complicated maintenance calendar.
Take five minutes to notice leaks, corrosion, unusual sounds, error codes, or changes in hot-water performance.
Keep the rhythm simple: take a five-minute look every few months, handle model-specific quick tasks when they are due, group annual maintenance, and track age and repair history before an older unit forces a rushed decision. AHA helps you know what matters, what can wait, and what to do next.